How to use self leveling compound
Table of Contents
-
What Is a Self-Leveling Compound?
-
When to Use a Self-Leveling Compound
-
Tools and Materials You Will Need
1. Introduction
Using a self-leveling compound is an effective way to create a smooth and even subfloor before installing new flooring materials such as vinyl, laminate, or tile. This guide explains when to use it, the tools required, and how to apply it correctly while ensuring long-lasting results.
2. What Is a Self-Leveling Compound?
A self-leveling compound is a cement-based mixture designed to flow easily and settle into a flat, uniform surface. It is often used to correct uneven subfloors, fill small depressions, and provide a stable base for flooring installation. The material spreads naturally with minimal manual intervention, making it ideal for both homeowners and professionals.
3. When to Use a Self-Leveling Compound
Self-leveling compound is recommended in the following situations:
-
Uneven or rough concrete subfloors
-
Minor dips or height variations across a room
-
Preparing the floor before laying rigid flooring like SPC flooring or tile
-
Restoring surface flatness after removing old flooring materials
4. Tools and Materials You Will Need
To achieve a professional finish, prepare the following:
-
Self-leveling compound
-
Mixing bucket
-
Drill with paddle mixer
-
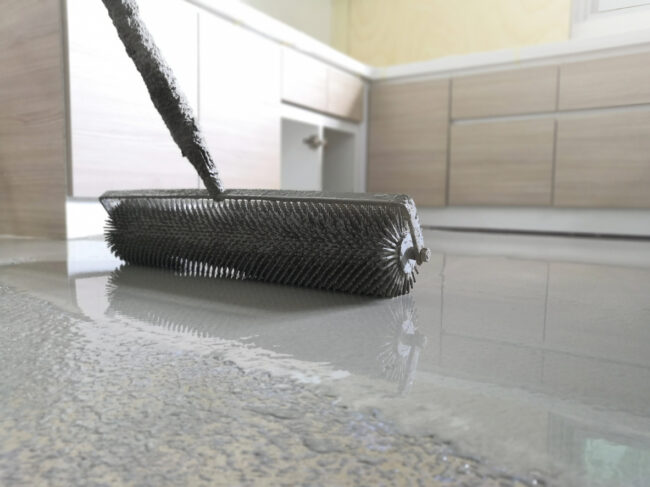
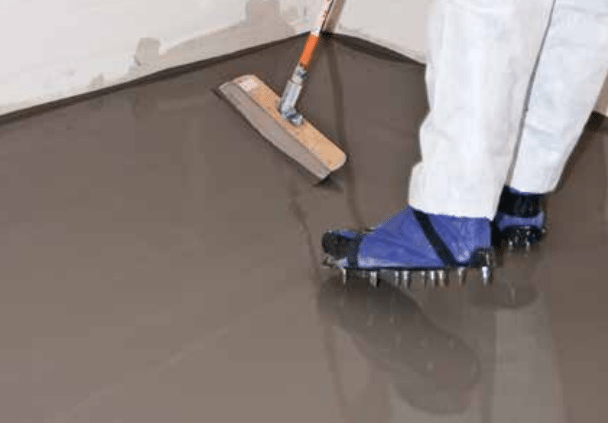
Trowel or gauge rake
-
Primer (recommended for better adhesion)
-
Measuring tools for checking floor level
-
Protective gloves and safety gear
5. Step-by-Step Guide
5.1 Inspect and Clean the Subfloor
Before applying the compound, inspect the surface for cracks, dust, grease, or debris. Clean the area thoroughly to ensure strong bonding. Repair visible cracks if necessary to prevent the compound from seeping through.
5.2 Prime the Surface
Applying a primer enhances the adhesion of the compound. Use a roller or brush to coat the surface evenly. Allow it to dry completely before applying the self-leveling mixture. This step also helps to prevent air bubbles and uneven drying.
5.3 Mix the Compound
Follow the manufacturer’s instructions and mix the compound with clean water until smooth. Use a drill with a paddle mixer for consistency. Avoid overmixing, as this may introduce excess air into the mixture.
5.4 Pour and Spread
Once mixed, pour the compound onto the floor starting from one corner. It will naturally flow, but you can use a trowel or gauge rake to guide it and ensure the material reaches every area. Work quickly, as self-leveling products typically set within minutes.
5.5 Allow Proper Drying Time
Let the compound dry completely before walking on it or installing flooring. Depending on the product, drying may take several hours. Always check the manufacturer guidelines to confirm the recommended curing time.
6. Tips for Best Results
-
Ensure the room temperature meets the requirements on the product label.
-
Avoid drafts or direct sunlight during drying.
-
Work in manageable sections to maintain consistency.
-
Use leveling markers if you need very precise height control.
-
Always follow the mixing ratio recommended by the manufacturer.
7. Conclusion
A self-leveling compound is a simple yet highly effective solution for achieving a smooth and even subfloor. By following the correct preparation steps, using suitable tools, and ensuring proper curing time, you can create a durable foundation for installing various flooring types such as vinyl, tile, or SPC flooring.